Introduction to Akamai WAF and Onboarding Domain
Introduction to Akamai WAF and Onboarding Domain
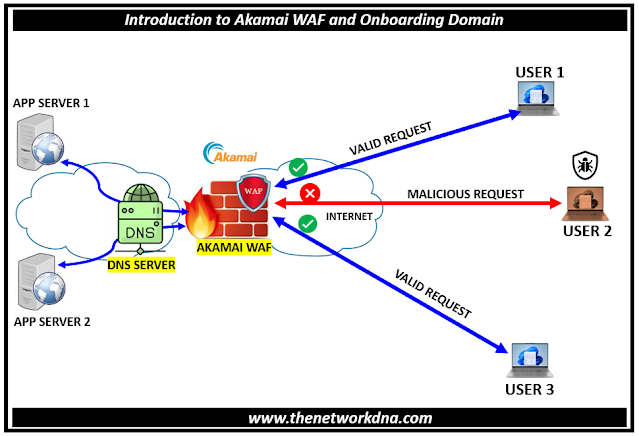
Akamai WAF is a cloud server and it deployed in front of below organization external websites and applications. It analyzes bi-directional web-based HTTP traffic detecting and blocking anything malicious. It also performs a deep inspection of every request and response for all the common forms of web traffic.
External users who are trying to access the website behind the Akamai WAF, first goes to Akamai WAF which process and apply all custom behaviors in order to filter out the bad malicious request.
Fig 1.1- Akamai WAF and Onboarding Domain
The domains in scope gets redirected with the help of unique CNAME configured on the Organizations external DNS servers which resolves on internet. Once the request traffic is processed, Akamai WAF send the same request to Origin Servers.
Since request needs to be process, Akamai required the SSL connection to be offload and therefore create two SSL request. First SSL session offload on Akamai server and second SSL session happens between Akamai and Origin Server.
Step 1: Login to Akamai portal with your login credentials as shown below
Akamai Portal URL : https://control.akamai.com/
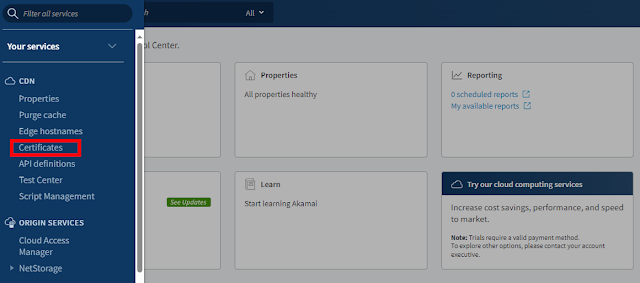
Step 2: When you click on the Akamai portal Under CDN >> Certificates as shown below
Step 3 : you will see a cert with Common name (SAN Count). Click on the action " View and Edit certification". You see the third option " Enter Certification Information" you need to edit it
Step 4: Add the domain which you want to be under the Akamai WAF and submit request. You will see below message on the portal.
Step 5: Now once the cert approved, you will now onboard the domain by navigating to CDN >>> Properties as shown below, now click on the property name
Step 6: Check the latest version which is active. On the top you will see "Active staging version" and beside there is a new version. Click on new version and you will now able to add the new domain for WAF protection
Property Hostname >>> +Hostname (on the right side) and add with the all details like
- Property Hostname
- Certificate
- Edge Hostname
- " Match All" Hostname is one of "xyz.com" where xyz.com is a host name to onboard.
- Origin Type : Your Origin
- Origin Server Hostname : origin-xyz.com
- Forward Host header : Origin Host Header
- IPv6 Origin Support : IPv4-Only
- Supports Gzip Compression : Yes
- Send True Client Header : No
- Use SNI TLS Extension : yes
- Match CN/SAN To: {{Origin Hostname}} {{Forward Host Header}}
- Akamai-managed Certificate Authority Sets : Akamai Certificate Store enabled
- HTTP Port : 80
- HTTPS Port : 443
- Enable : On
- Optimization Type: Performance
- Force SSL Protocol for Races : Off
Continue Reading...


