
Site-to-Site IPsec VPN Tunnel with two FortiGate Firewalls
Site-to-Site IPsec VPN Tunnel with two FortiGate Firewalls
We will discuss how to set up an IPsec VPN connection between two FortiGate firewalls.
Fortigate Firewalls
With SSL inspection and industry-leading threat protection from Fortinet Network Firewalls, you can view Layer 7 applications.
With Fortinet Application Control, you can use dynamic application policies, filter-level controls, and more to implement smarter, more effective security controls and decrease your enterprise attack surface.
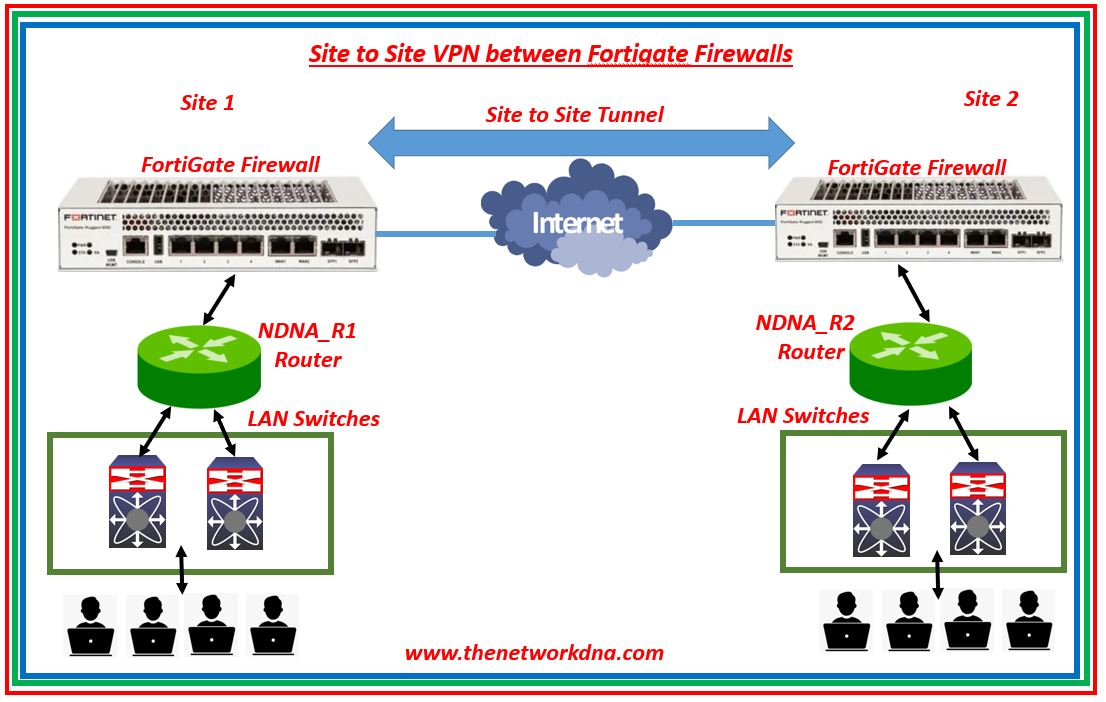 |
| Fig 1.1- Fortigate Site to Site VPN |
On Site 1 FortiGate Firewall
Navigate to VPN > IPsec wizard and create a new tunnel.
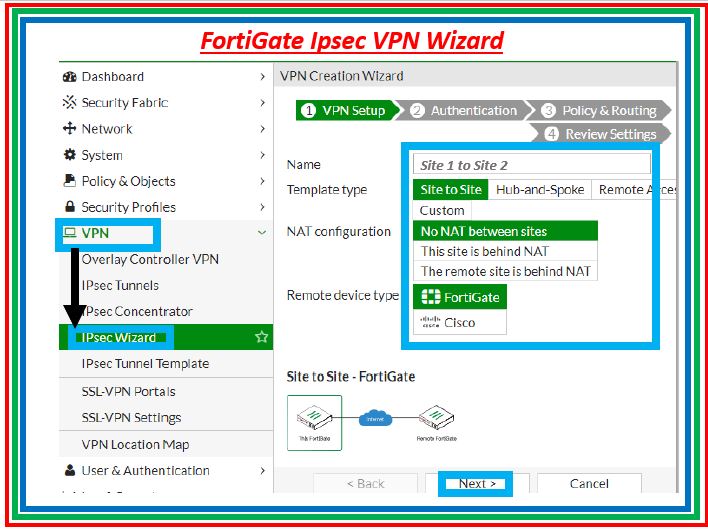 |
| Fig 1.2- VPN Wizard |
Set the Template type to Site-to-Site, the NAT configuration to NO NAT between sites, the VPN setup section's VPN name to make it identifiable, and the Remote Device type to FortiGate.
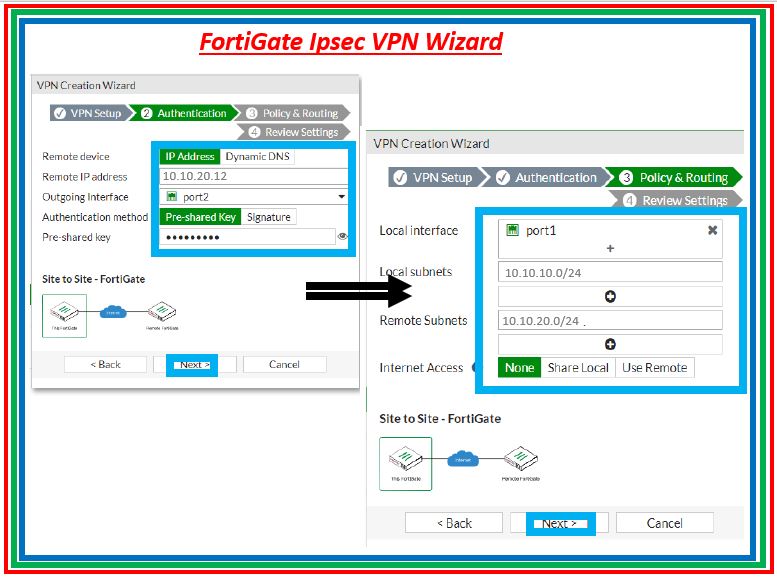
Set the Public IP address of the Site 2 FortiGate as the IP address in the Authentication Section. An interface is assigned to the outgoing interface after the IP address is entered. With the help of the drop-down menu, you can customize the interface to your needs.
 |
| Fig 1.3- VPN Wizard |
Create a secure Pre-shared key that will be used for both FortiGate' connection and verification. Set "Remote Subnets" to the Branch network and "Internet Access" to "None" in the Policy and Routing section, as shown below. In my case, "Port1" is dedicated to the LAN and local subnets will be added automatically.
After confirming it, go over the configuration summary you created, which displays the interfaces, firewall addresses, routes, and policies. select design an icon
Similarly On Site 2 FortiGate Firewall,
GO to VPN > IPsec wizard and create a new tunnel.
 |
| Fig 1.4- VPN Wizard |
Set the Template type to Site-to-Site, the NAT configuration to "NO NAT" between sites, and the Remote Device type to FortiGate as described in the section on setting up a VPN connection.
Set the Public IP address of the Branch FortiGate as the IP address in the Authentication Section. An interface is assigned to the outgoing interface after the IP address is entered. With the help of the drop-down menu, you can customize the interface to your needs.
Create a safe Pre-shared key to be used with the FortiGate Site 1 VPN.
 |
| Fig 1.5- VPN Wizard |
Users of Site 1 can access resources on the internal network of the Branch, and vice versa, so that is another way to confirm it.
Ping Site 1 LAN interface using the device branch internal network to verify the connection. Alternatively, you can view all of the VPN's individual logs by going to Log & Report > Events > VPN Events.


