
Cisco Viptela SDWAN: How to add the Controller profile in PNP portal
Cisco Viptela SDWAN: How to add the Controller profile in PNP portal
Before we start with the Cisco SDWAN Plug-and-Play Connect, you may aware that we need to add the Controller profile in the Plug-and-Play Connect portal, Once done, you need to resync the device inventory on the Viptela vManage in order to see the device there.
Cisco Plug-and-Play (PnP)
The Cisco Plug-and-Play (PnP) Connect portal will automatically accept devices manufactured as part of the Cisco Commerce Order, and which have been assigned a Smart and Virtual Account. Admins can view all network devices purchased through the Plug-and-Play portal.
 |
| Fig 1.1- Cisco SDWAN PNP Portal |
In order to whitelist the Cisco SDWAN solution, the WAN Edge devices must have a vBond controller profile in the Plug and Play Connect portal, which allows the routers to join the Cisco SDWAN overlay network.
So here in this article we are talking about vBond controller profile in the Plug and Play Connect portal
Step 1: “Add Profile” On the Controller Profiles tab in PNP online portal for SDWAN
 |
| Fig 1.2- Cisco SDWAN PNP Portal |
Step 2: Enter the controller type as “vBond” and click “Next”
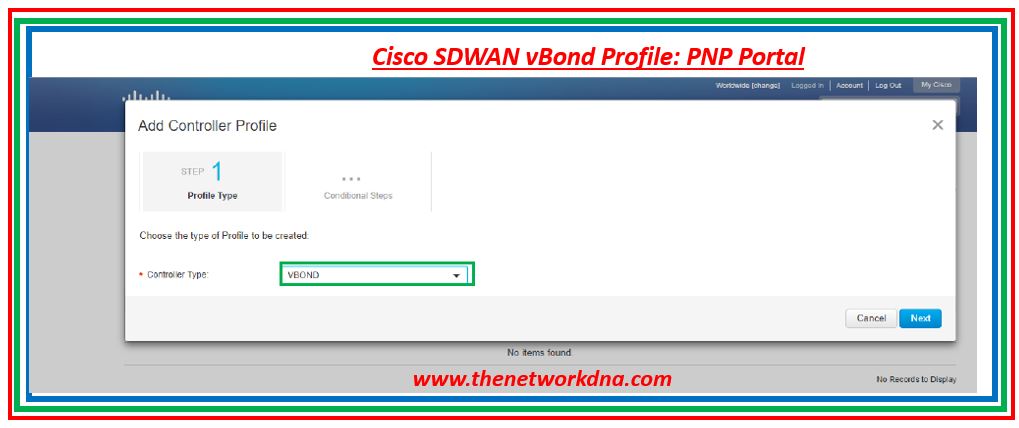 |
| Fig 1.3- Cisco SDWAN PNP Portal |
Step 3: Enter the data in “Add Controller Profile” and click “Next”. Enter the organization name used in vManage and the domain/IP address of the vBond controller.
 |
| Fig 1.4- Cisco SDWAN PNP Portal |
Step 4: The system displays all the vBond Information as in the following screenshot.
 |
| Fig 1.5- Cisco SDWAN PNP Portal |
Step 5: Click “Submit”
 |
| Fig 1.6- Cisco SDWAN PNP Portal |
Step 6: Click “Done”. The profile is created.
Review all the inputs and click on the submit button. Verify the device is successfully added to the Plug-and-Play Connect portal and associated with the vBond controller profile


